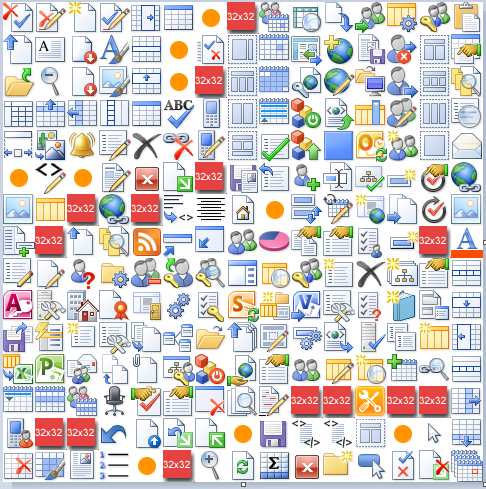
While creating a new ribbon button, you will have to pick the button image.
This handy image is located here: http://yousite/_layouts/en/images/formatmap32x32.png
Now you will need to reference the top left corner of the image:
Open it in MS Paint and hover the top left corner of the image to get the approximate values. Each image is 32×32 pixels, so you can just start multiplying by 32 to go across and same to go down to get the exact values.
So, for example, go 448 px down and 384 px from the left
This image for the check mark

is located at Image32by32Top=“-448“
Image32by32Left=“-384“ (down at the bottom right corner)

For the formatmap16x16.png image just divide by 2.
Here is a portion of the Elements.xml that references the button image location:
<CommandUIDefinition
Location=“Ribbon.ListItem.Workflow.Controls._children“>
<Button
Id=“SurfPoint.SharePoint.Ribbon.NewControlInExistingGroup.Notify”
LabelText=“Approve Records to Delete”
ToolTipTitle=“Approve Records to Delete”
ToolTipDescription=“Check all records to delete then press this button after all records have been selected on this page.”
Command=“SurfPoint.Command.NewControlInExistingGroup.Notify”
Sequence=“21”
Image16by16=“/_layouts/$Resources:core,Language;/images/formatmap16x16.png”
Image16by16Top=“-48“
Image16by16Left=“-240”
Image32by32=“/_layouts/$Resources:core,Language;/images/formatmap32x32.png”
Image32by32Top=“-448“
Image32by32Left=“-384”
TemplateAlias=“o2“/>
</CommandUIDefinition>
In this case I was adding a button to do multiple approvals for list items at the same time. There are a few blog posts out there on how to do that and so far it is working well.

Nice blog post. Saved me a lot of time.